Pilates for beginners can be intimidating. There’s a lot of new choreography to learn and a lot of equipment involved, and it can be a lot to tackle for the first time in a bustling group class. If you’re a Pilates beginner, there is some essential reading and prep you can do before you set foot in a studio for the first time.
Pilates is about the gorgeous art of movement. It’s fitness, of course, but it’s also a truly beautiful and fluid way to allow your body to move. Pilates was originally called “Contrology” by the founder of the method, Joe Pilates. He committed his entire life to movement, teaching fitness, and instructing others within his creative method. Our guess was that Joe wished for all of his students to gain more intent and control in their bodies, with mobility and stability working together. A Boom Pilates newbie is always surprised to find that this method really drives strength and power through every part of the body, from the first session on!
The most common obstacles that Pilates studios must overcome with a new client often involve the intimidating equipment and props used to deliver this method of movement. The intense Pilates “beds,” springs, loops and straps look complicated and can be a real deterrent for some Pilates newbies.
If you’re new to Pilates and nervous about starting, you might want to try to find a studio or instructor that offers private sessions. These private Pilates sessions can help new Pilates students by allowing for dedicated time to go over the anatomy of the multiple pieces of Pilates equipment, slowly building up your confidence with choreography, and allow you some quality time to gain control over the tools before joining a more seasoned group class.
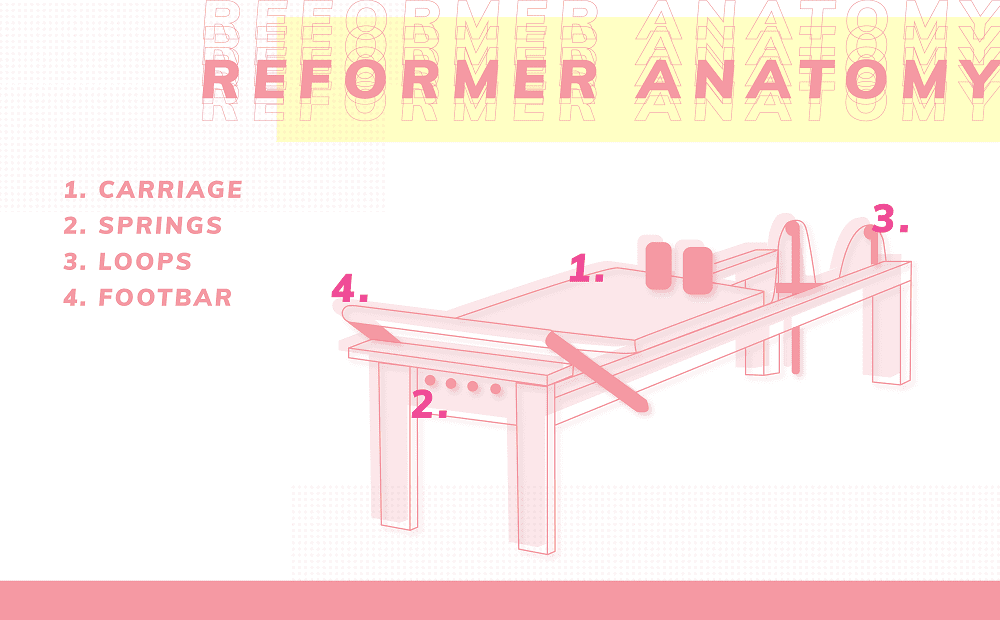
To help aid our newbies in their curiosity, we sketched a cheat-sheet for you to review here prior to signing up for your first Pilates class. This is a quick 4-point visual of one of the most popular pieces of equipment, the Pilates reformer.

1. Carriage
The main part of the reformer is not actually called a “bed;” it’s referred to as the “carriage.” This section does, however, resemble a bed, and that resemblance speaks to the history of the invention of the reformer. Joe Pilates was known for dealing with his own health issues by using a similar contraption, way back in the 1910s, that relied on spring resistance and an actual hospital bed to aid in his own remarkable strength journey. When you’re lying forward on the carriage, your head stays centered on the headrest and your shoulders will both touch the two shoulder rests.
2. Springs
The springs are located under the carriage, and all five springs hook in to a metal bar, depending on how high (or how low) the resistance needs to be. Contrary to many fitness methods, the Pilates reformer springs are not correlated with weight (in pounds). Instead, they are colored and correlate with resistance levels. The reformer in the graphic above is a sketch replica of the Merrithew brand V2Max reformer. With this particular piece of equipment:
– the three red colored springs equally model a measurement of 1.0 (or one spring).
– the one blue colored spring models a measurement of .50 (or half spring).
– the one white colored spring models a measurement of .25 (or quarter spring).
If this part doesn’t quite make sense, don’t worry. Your instructor should immediately know how to gauge this for your body in all of your sessions. Just remember this tip: If you decide you want to change your own springs, always add before you remove. (We are looking for Boom Pilates, not Zoom Pilates!)
3. Loops
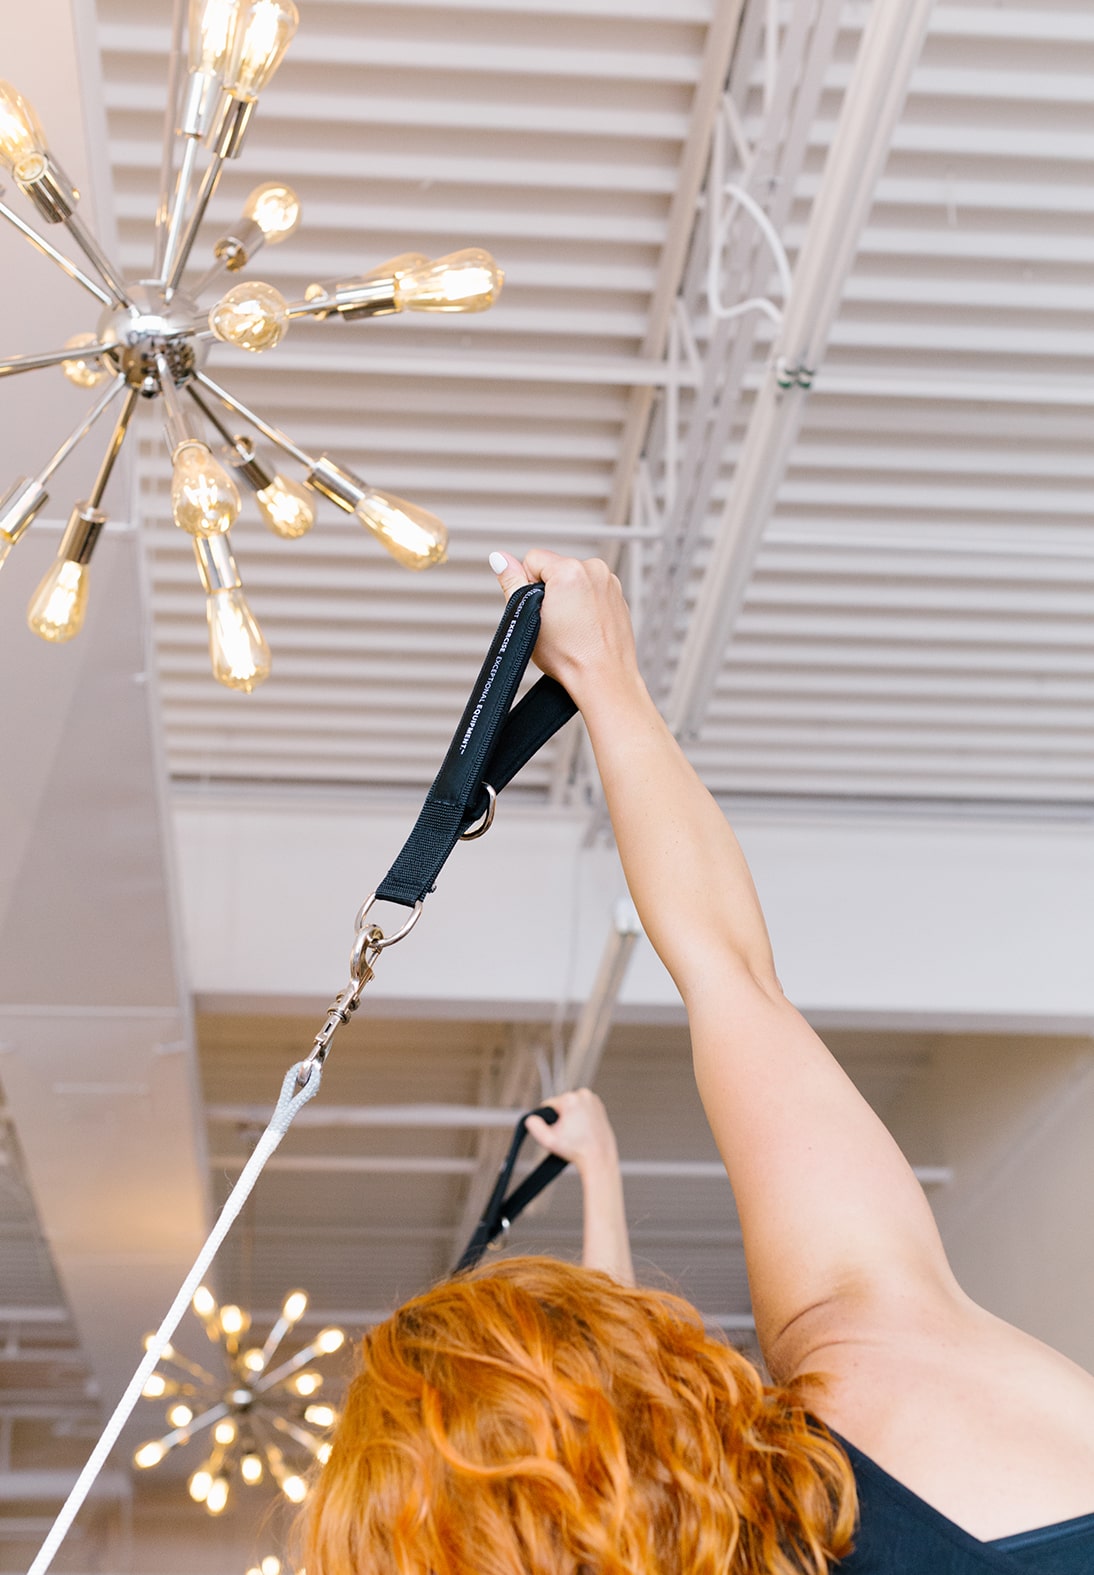
The loops double as a place for your hands/arms to pull against resistance, and the loops also work as a resistance tool for your feet/legs. The straps often go over your feet, pulling your legs back and forth while your spine is safely placed against the carriage. The loops are a basic pulley-system built in to the reformer, and these props are a real crowd pleaser for instructors and students alike.
4. Foot Bar
The foot bar is a place for your feet to rest while you’re lying on the carriage and working all of your leg muscles in a series of moves, often called “footwork.” The foot bar also doubles as a hand bar in many exercise blocks. The bar can lift and lower to assist with new angles, spinal placement, or postural edits within the choreography. Your foot bar will often be placed up at the top level for your initial Pilates sessions and it naturally feels sturdy against your feet as you move back and forth in a series of leg reps.
These four points cover the key areas of the Pilates Reformer. However, there are still multiple other parts, props, and additional tools included in the vast programming of this wild fitness machine. Don’t forget to research all the private (or semi-private) options in your new studio before jumping into a fast-paced reformer class.
If you want to experience all the above with just a little sweat and some funky dance music, reach out to Boom Pilates to book your first sesh! Boom Pilates offers three “Essential Level” group Pilates for beginners training classes each week: Mondays at 6:30 p.m., Tuesdays at 8:30 a.m. and Saturdays at 10 a.m. These Essential sessions safely cater to Pilates newbies who are seeking out more core control and proper form.
With this preparation and guidance, you’ll master Pilates for beginners, and we’ll see ya in the Boom room soon!

